Create or edit an automation
Build or change a follow-up automation in the visual builder: a flow canvas showing the trigger and its action steps, a settings panel on the right for the selected node, and a Dry-run view that previews what would send against sample or real call data. Creating and editing use the same builder — pick a trigger, add conditions, configure one or more channel steps, preview, then save.
Audience: Operations users · Page address: /app/automations/new
Common tasks
- Name the automation and choose a trigger
- Add workflow conditions
- Configure each action step and its channel
- Preview in Dry-run, then create or save
How to use this page
1. Open the builder
Reach the same builder whether you are starting fresh or changing an existing automation.
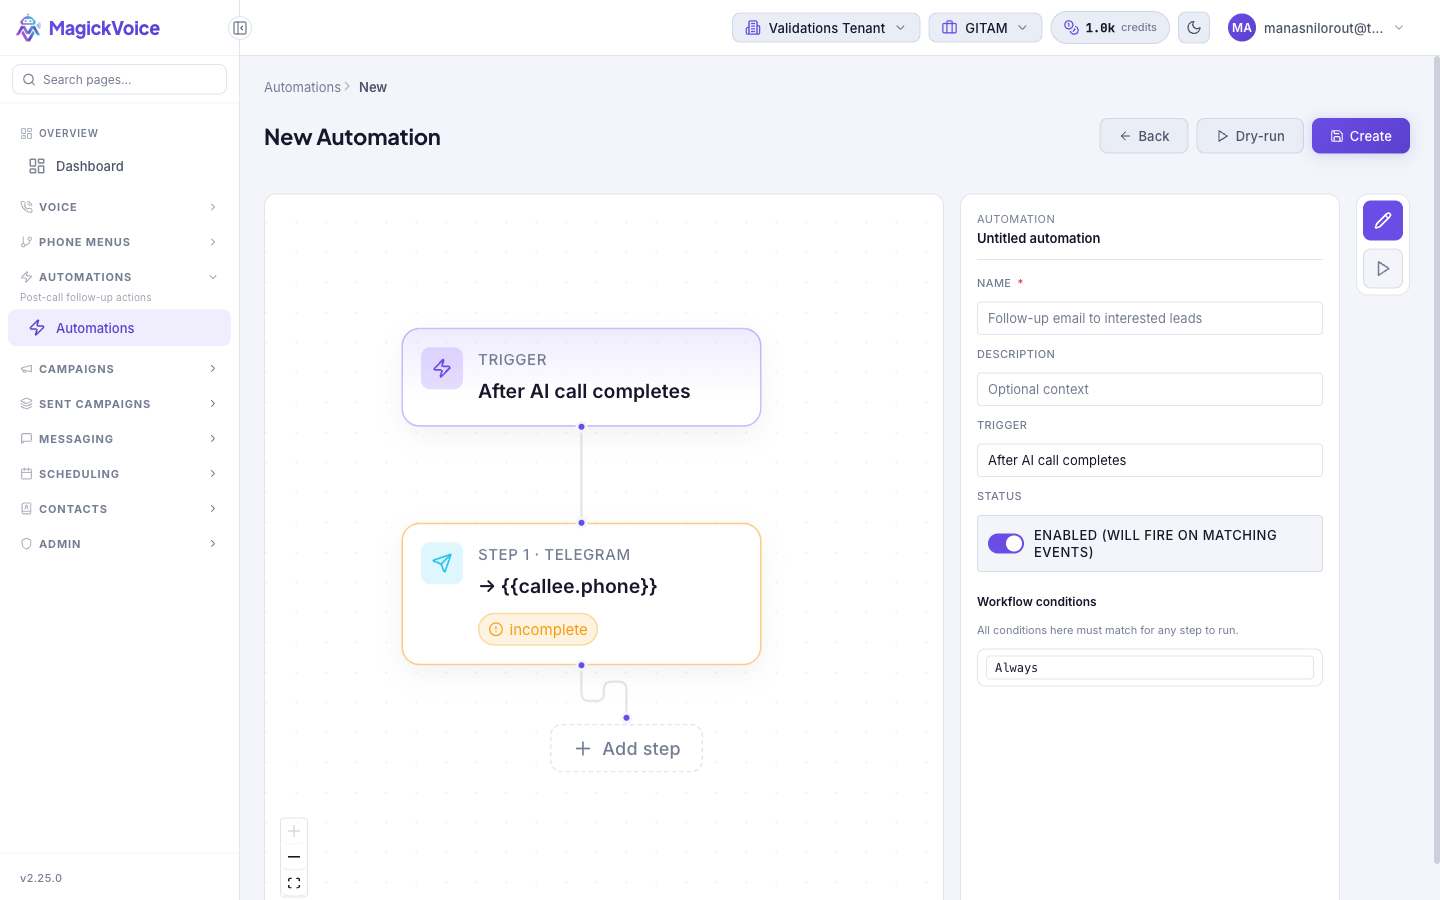
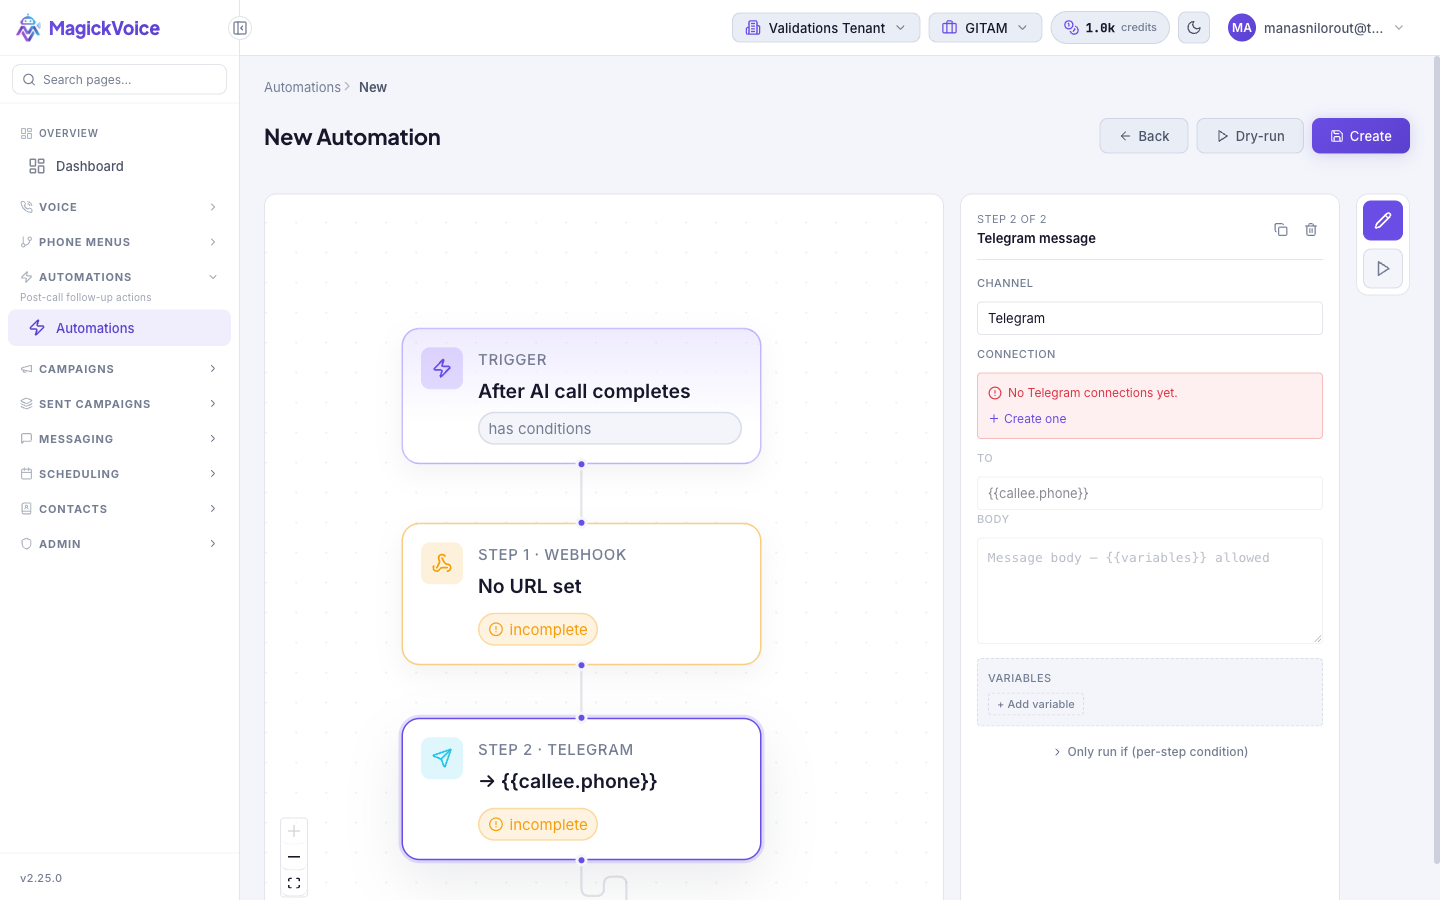
- To create one, select New Automation on the Automations page. The builder opens with a Trigger node and one action step already on the canvas.
- To change an existing one, select Edit on its row (or the Edit button on its detail page). The builder opens on the saved flow, using the same canvas, node settings, and Editor / Dry-run tabs.
- Everything below applies to both. The only difference: a new automation shows Create in the header, an existing one shows Save.
2. Name the automation and pick a trigger
Set the identity and the starting event, since the trigger decides which calls the automation reacts to.
- Select the Trigger node (or the empty canvas) to show the automation settings in the right panel.
- Give it a Name (required) so it is easy to find later, and add an optional Description for context your teammates will read.
- Choose the Trigger — the event that starts the automation: After AI call completes, After analysis is ready, After IVR completes, or After announcement completes. Pick the one that matches the follow-up you want; for example, use After analysis is ready when your condition depends on the call's analyzed outcome rather than just that it ended.
- Leave Status set to Enabled for the automation to fire on matching events, or clear it to save the automation without it running yet.
3. Gate the flow with workflow conditions
Decide which calls actually deserve a follow-up, so you do not message everyone who was called.
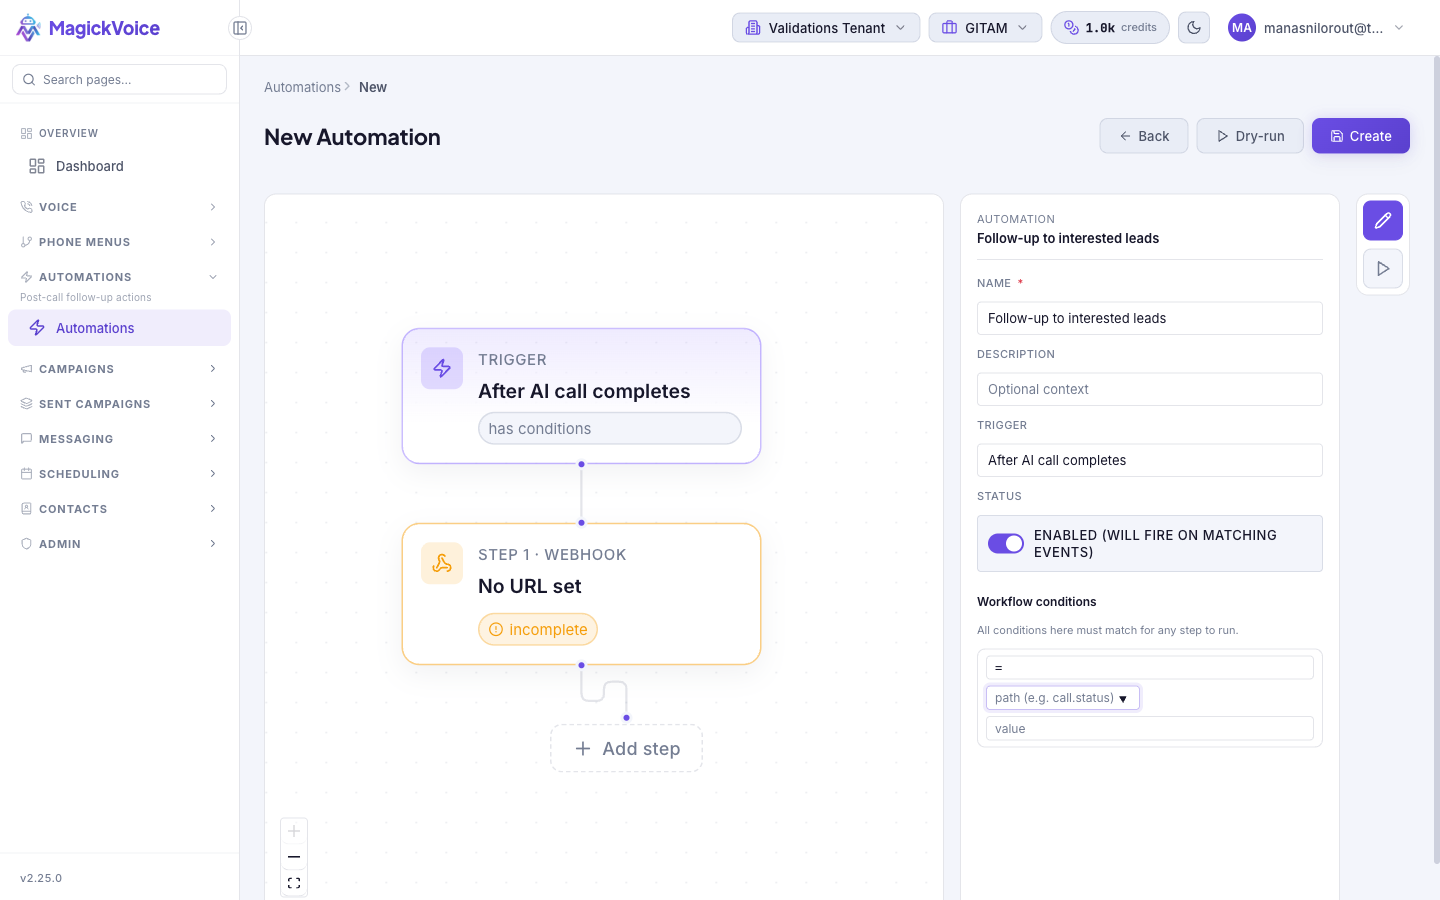
- With the trigger node selected, find Workflow conditions in the right panel. All conditions here must match before any step runs.
- Leave the operator on Always to run for every matching event, or choose an operator to add a rule: comparisons (=, ≠, >, ≥, <, ≤), list membership (In, Not in), presence (Exists, Missing), text tests (Contains, Starts with, Ends with), or the logical groups AND group, OR group, and NOT for combining several rules.
- For a comparison, fill in the path and the value. The path is a dotted reference to call data — for example
call.status,call.talk_time_seconds,callee.phone,callee.name,callee.language,callee.metadata.<key>, orvariables.<key>. The field suggests the common paths as you type. - Once a condition is set, the trigger node on the canvas is labeled has conditions so you can see at a glance that the flow is gated.
4. Configure an action step
Set up what actually gets sent. Each step has one Channel, and a step will not fire until its required fields are complete — until then the canvas node is labeled incomplete.
- Select the action step on the canvas to open its settings, then choose a Channel. There are five step types: four message channels — Telegram, WhatsApp, WhatsApp Personal, and Email — and one request channel, Webhook. Each is defined in its own section below.
- Fill in the channel's fields (recipient, body, and so on). Text fields accept
{{variable}}placeholders that are resolved per run from the call context — for example{{callee.name}}or{{call.status}}. - Use the Variables section and + Add variable to define named values the step can reuse across its fields.
- Use Only run if (per-step condition) to add a condition that gates just this step, on top of the workflow-level conditions — useful when one step in a chain should only send in a narrower case. It uses the same operators and paths as the workflow conditions.
5. How steps connect to messaging connections
Understand the link between a step's channel and your messaging setup, because the four message channels can't send until a matching connection exists.
- A connection links MagickVoice to an account it can send through. Message channels reuse the same connections you manage on Messaging connections, so each channel maps to a connection type: Telegram → a Telegram bot connection, WhatsApp and WhatsApp Personal → a WhatsApp connection, and Email → a verified email sending domain.
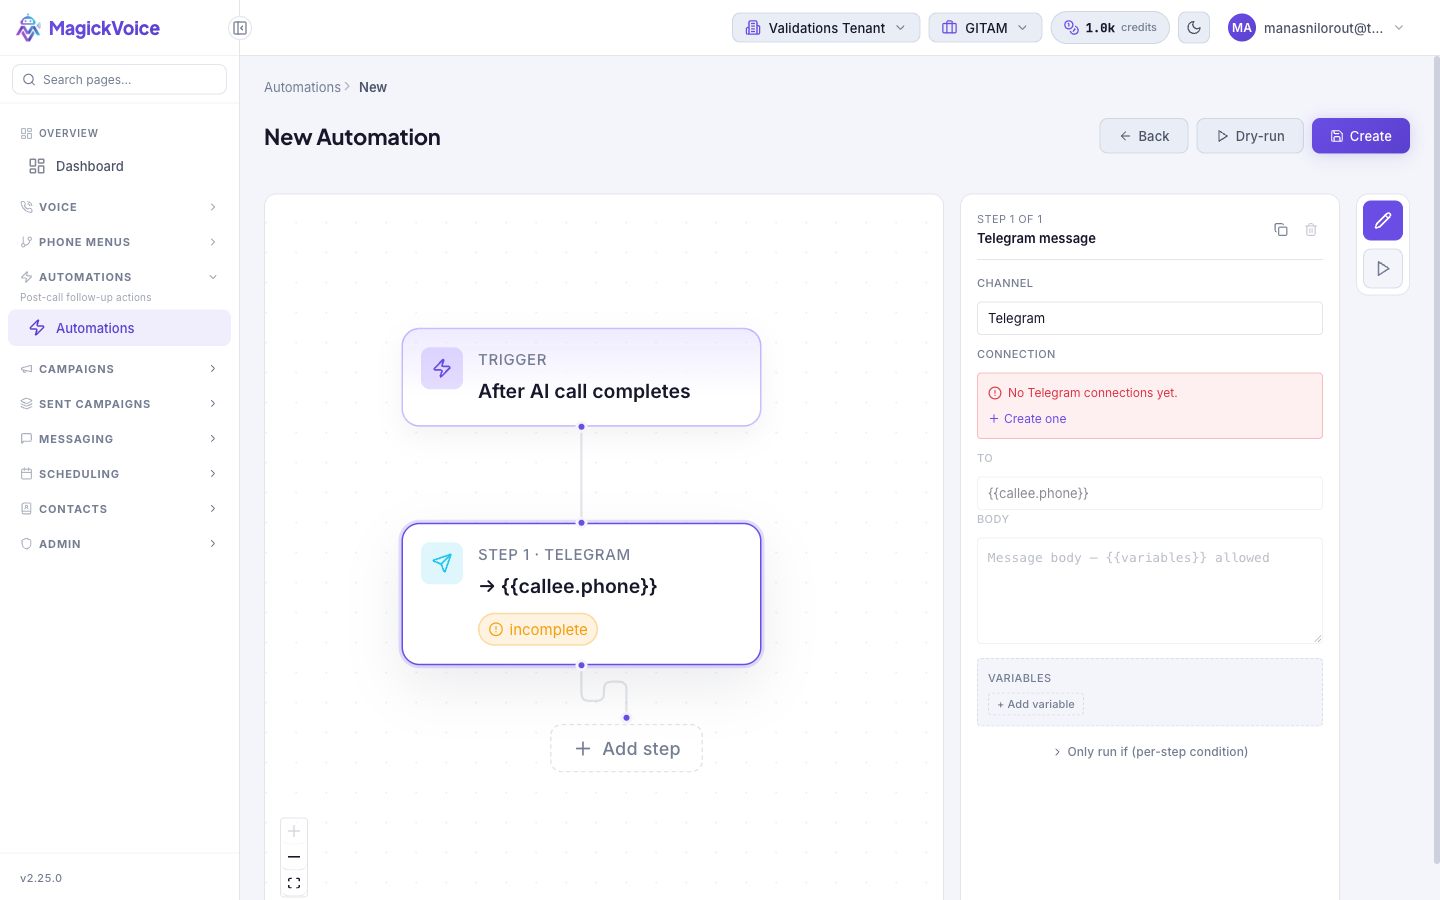
- When a message step's Connection field reads No connections yet, use its Create one link — it opens Messaging connections where you add the connection (a Telegram bot token, a Meta Business WhatsApp number, or an email domain). Add it, then return to the builder and pick it.
- Until a connection is selected, the To and Body fields stay disabled and the step remains incomplete, so it will not send.
- The Webhook channel is the exception — it needs no connection. It posts directly to a URL you supply, so it works without any Messaging setup.
6. Step type — Telegram, WhatsApp, and WhatsApp Personal
Send the contact a chat message after the call. These three message channels share the same fields.
- Connection (required): the messaging connection to send through — a Telegram bot for Telegram, or a WhatsApp connection for WhatsApp and WhatsApp Personal. See Messaging connections to set one up.
- To (required): the recipient, defaulting to
{{callee.phone}}so it messages the person who was called. Change it, or use another{{variable}}, to send elsewhere. - Body (required): the message text. Supports
{{variable}}placeholders for per-run personalization. - Use these when the follow-up is a direct message to the contact — a confirmation, a link, or a next-step prompt right after the call ends.
7. Step type — Email
Send an email after the call, either free-form or from a saved template.
- Connection (required): an email connection backed by a verified sending domain (managed on Messaging connections).
- To (required): the recipient address; use
{{callee.email}}to reach the contact from the call context. - Subject (required): the email subject line; supports
{{variables}}. - Template: optionally choose one of your active email templates (managed on Messaging templates). The dropdown reads No active email templates until you have one.
- Body: used only when no template is selected — supply HTML or plain text, with
{{variables}}allowed. - Use Email for longer or formatted follow-ups, or when you want a consistent branded layout via a template.
8. Step type — Webhook
Post the call data to your own system instead of messaging a person — for example, to sync an outcome into your CRM. This channel needs no messaging connection.
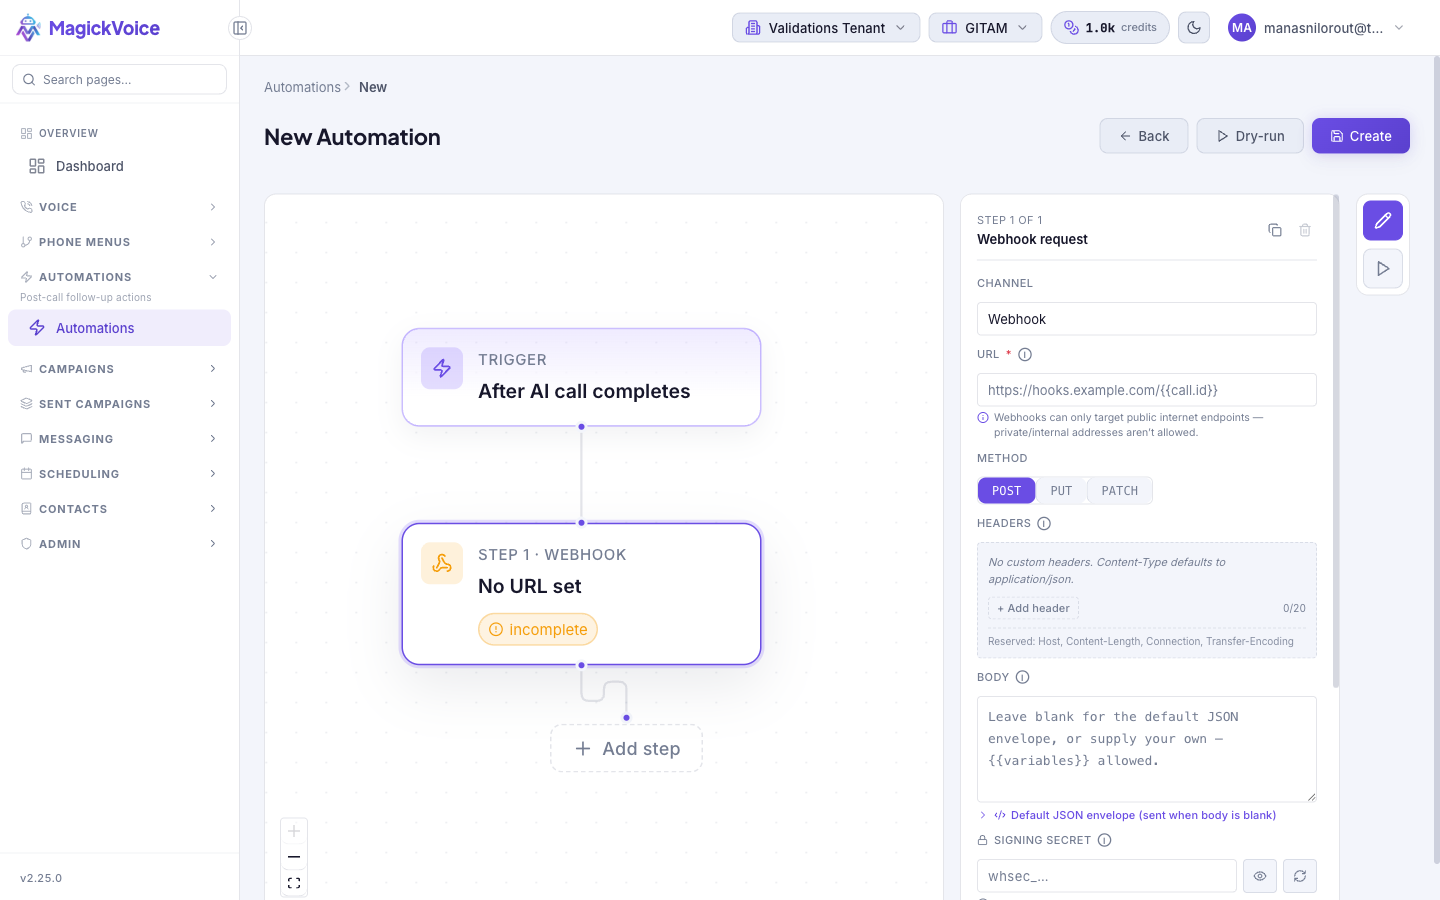
- URL (required): a public
https://endpoint that receives the request. Private or internal addresses are rejected — the endpoint must be reachable from the public internet. The URL supports{{dotted.path}}variables resolved per run. - Method: POST, PUT, or PATCH.
- Headers: up to 20 custom request headers; values support
{{variables}}.Content-Typedefaults toapplication/json, and the framing headersHost,Content-Length,Connection, andTransfer-Encodingare managed for you and cannot be set. - Body: leave blank to send the default JSON envelope (use the Default JSON envelope disclosure to see its shape), or supply your own template with
{{variables}}. - Signing secret: optional. Enter one or use Generate secret. When set, each request is signed with HMAC-SHA256 and carries
X-Magick-SignatureandX-Magick-Timestampso your receiver can verify the request genuinely came from MagickVoice. Leave it blank to send unsigned requests. - Note the Delivery details shown in the panel: every request carries
X-Magick-Event,X-Magick-Delivery-Id, and anIdempotency-Key(the run id) so your receiver can safely dedupe retries; network errors, 15-second timeouts, and5xxresponses are retried, while4xx, redirects (not followed), and blocked URLs are terminal; each successful send costs 10 millicredits (~0.01 credits).
9. Chain multiple steps
Build a sequence when one event should trigger more than one follow-up.
- Select Add step on the canvas to append another action. Steps run top to bottom in the order shown.
- Configure each step's channel independently — for example, post a webhook to your CRM, then send the lead a Telegram confirmation.
- Use Duplicate step to copy a configured step, or Remove step to delete one. At least one step is always required, so the remove control is disabled when only one step remains.
- Give any step its own Only run if condition so different steps in the same flow can fire under different circumstances.
10. Preview in Dry-run, then save
Confirm the flow behaves before it messages real contacts, since a live automation sends to real recipients and spends credits.
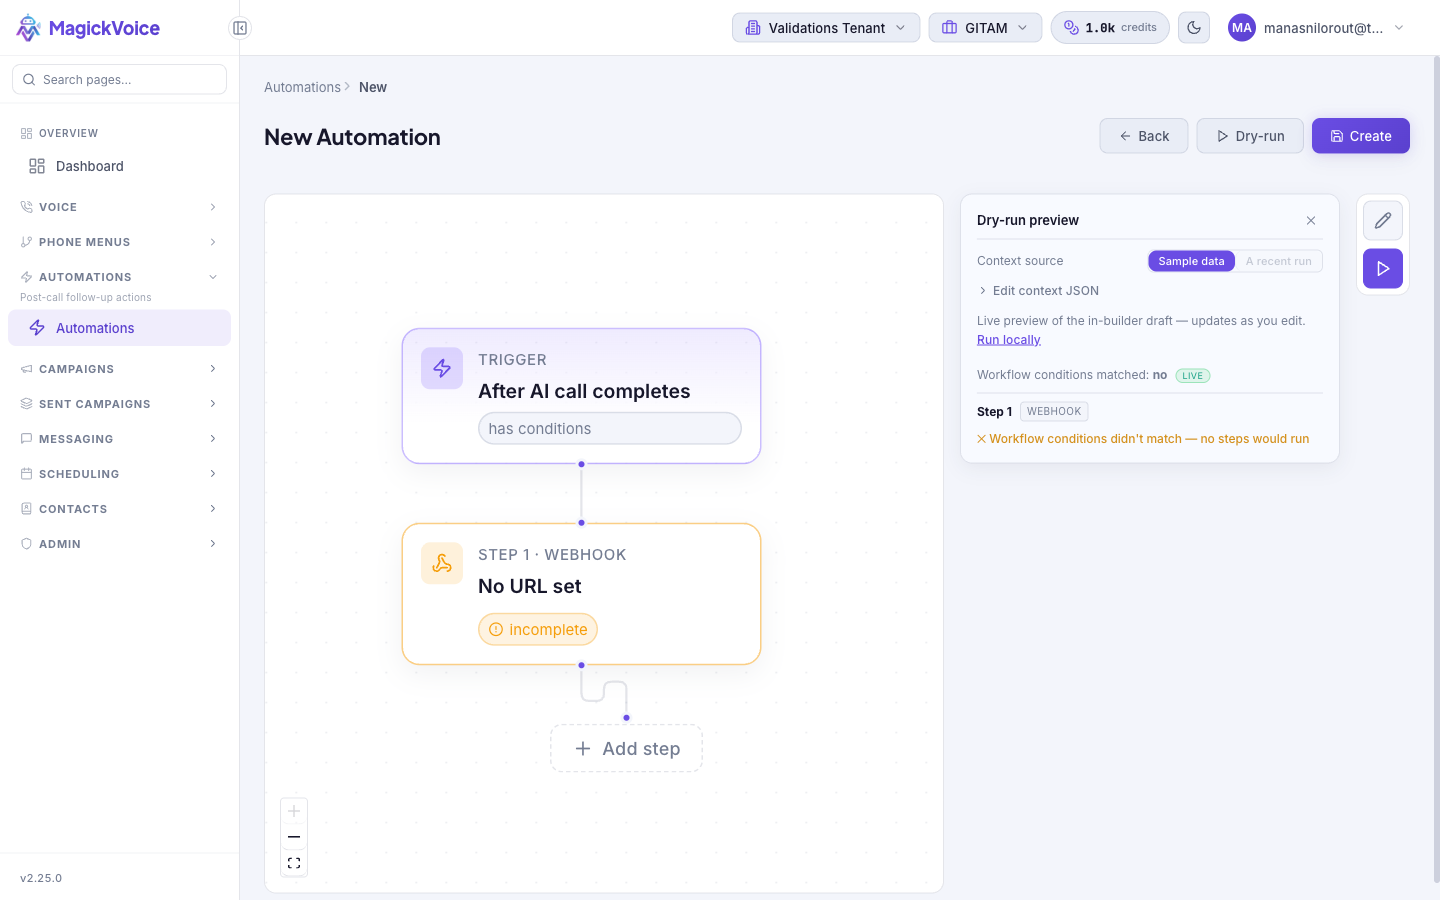
- Switch to the Dry-run tab (top right, or the Dry-run button in the header). It evaluates the current draft and updates as you edit.
- Choose a Context source: Sample data (a built-in example call) or A recent run when a real run is available to replay against.
- Use Edit context JSON to inspect or adjust the sample context — the
call,callee,tenant, andaccountobjects whose fields your conditions and{{variables}}read from. - Read the result: it reports whether Workflow conditions matched and, for each step, whether it would send or was skipped (for example, Workflow conditions didn't match — no steps would run). Use Run locally to re-evaluate. Nothing is sent and no credits are spent in Dry-run.
- Select Create (new) or Save (existing) in the header. If Status is enabled, it begins firing on matching events; otherwise it is saved paused until you enable it. After creating, you land on the automation's edit view, and it appears in the Automations list.
11. Edit an existing automation safely
Treat a change to a live automation as affecting calls from now on, since an enabled automation acts on future matching events the moment you save.
- Open the automation in the builder with Edit, and confirm you have the right one by its Name in the right panel.
- Change the trigger, conditions, or any step as above. Each step re-checks its required fields, so watch for one that flips back to incomplete.
- To stage several changes before any go live, clear Status to disable the automation first, make your edits, then re-enable it once the flow is correct.
- Preview the revised flow in Dry-run to confirm it matches — and skips — the calls you expect, then Save. Check the next entries in Run history on the detail page to confirm it behaves as intended.
Tips and troubleshooting
- Start with a narrow trigger, test it, then broaden conditions after confirming the first run behaves correctly.
- Use the run drawer or detail page when you need evidence of what happened during an automation run.
- Creating and editing use the same builder; the only difference is that an edit opens on the saved flow. Saving a new automation lands you on its edit view.
- Start with a narrow trigger and tight conditions, preview it in Dry-run, then broaden the conditions once the first run behaves the way you expect.
- A step stays marked "incomplete" until its required fields are set — a message channel needs a connection and a body; a webhook needs a public https URL — and an incomplete step will not send.
- Message channels need a messaging connection to exist first. If a step reports "No connections yet," add one on [Messaging connections](/docs/messaging-connections), then return to the builder.